The Visibly Verification API automates the federally mandated prescription verification process. Under the Contact Lens Rule (CLR), retailers must either review a physical prescription or contact a patient’s doctor, allowing a strictly defined eight business-hour window for a response.
This integration handles the complexities of compliance, doctor communications, and manual reviews, allowing you to focus on your core commerce experience.
Follow these steps to complete your integration:
- Authenticate: Exchange your credentials for an OAuth 2.0 access token.
- Select a Flow: Determine if you will verify via File Upload or Doctor Contact.
- Submit Request: Call the
verifyContactsPrescriptionmutation to initiate the job. - Listen for Updates: Set up an HTTPS webhook using
createNotificationSubscriptionto receive real-time status changes. - Querying: Manually poll for updates using the jobId.
Visibly provides two distinct environments. All API requests require a Bearer token obtained from the corresponding Auth endpoint.
| Detail | Sandbox (Testing) | Production (Live) |
|---|---|---|
| Auth Endpoint | https://sandbox-visibly.auth.us-east-1.amazoncognito.com/oauth2/token | https://prod-visibly.auth.us-east-1.amazoncognito.com/oauth2/token |
| GraphQL API | https://api.sandbox.govisibly.com/ | https://api.govisibly.com/ |
| Purpose | Development and end-to-end testing with mock data. | Live verification requests and real doctor contact. |
The following diagram illustrates the standard integration lifecycle, from the user's selection in your frontend to receiving the final verification status via webhook.
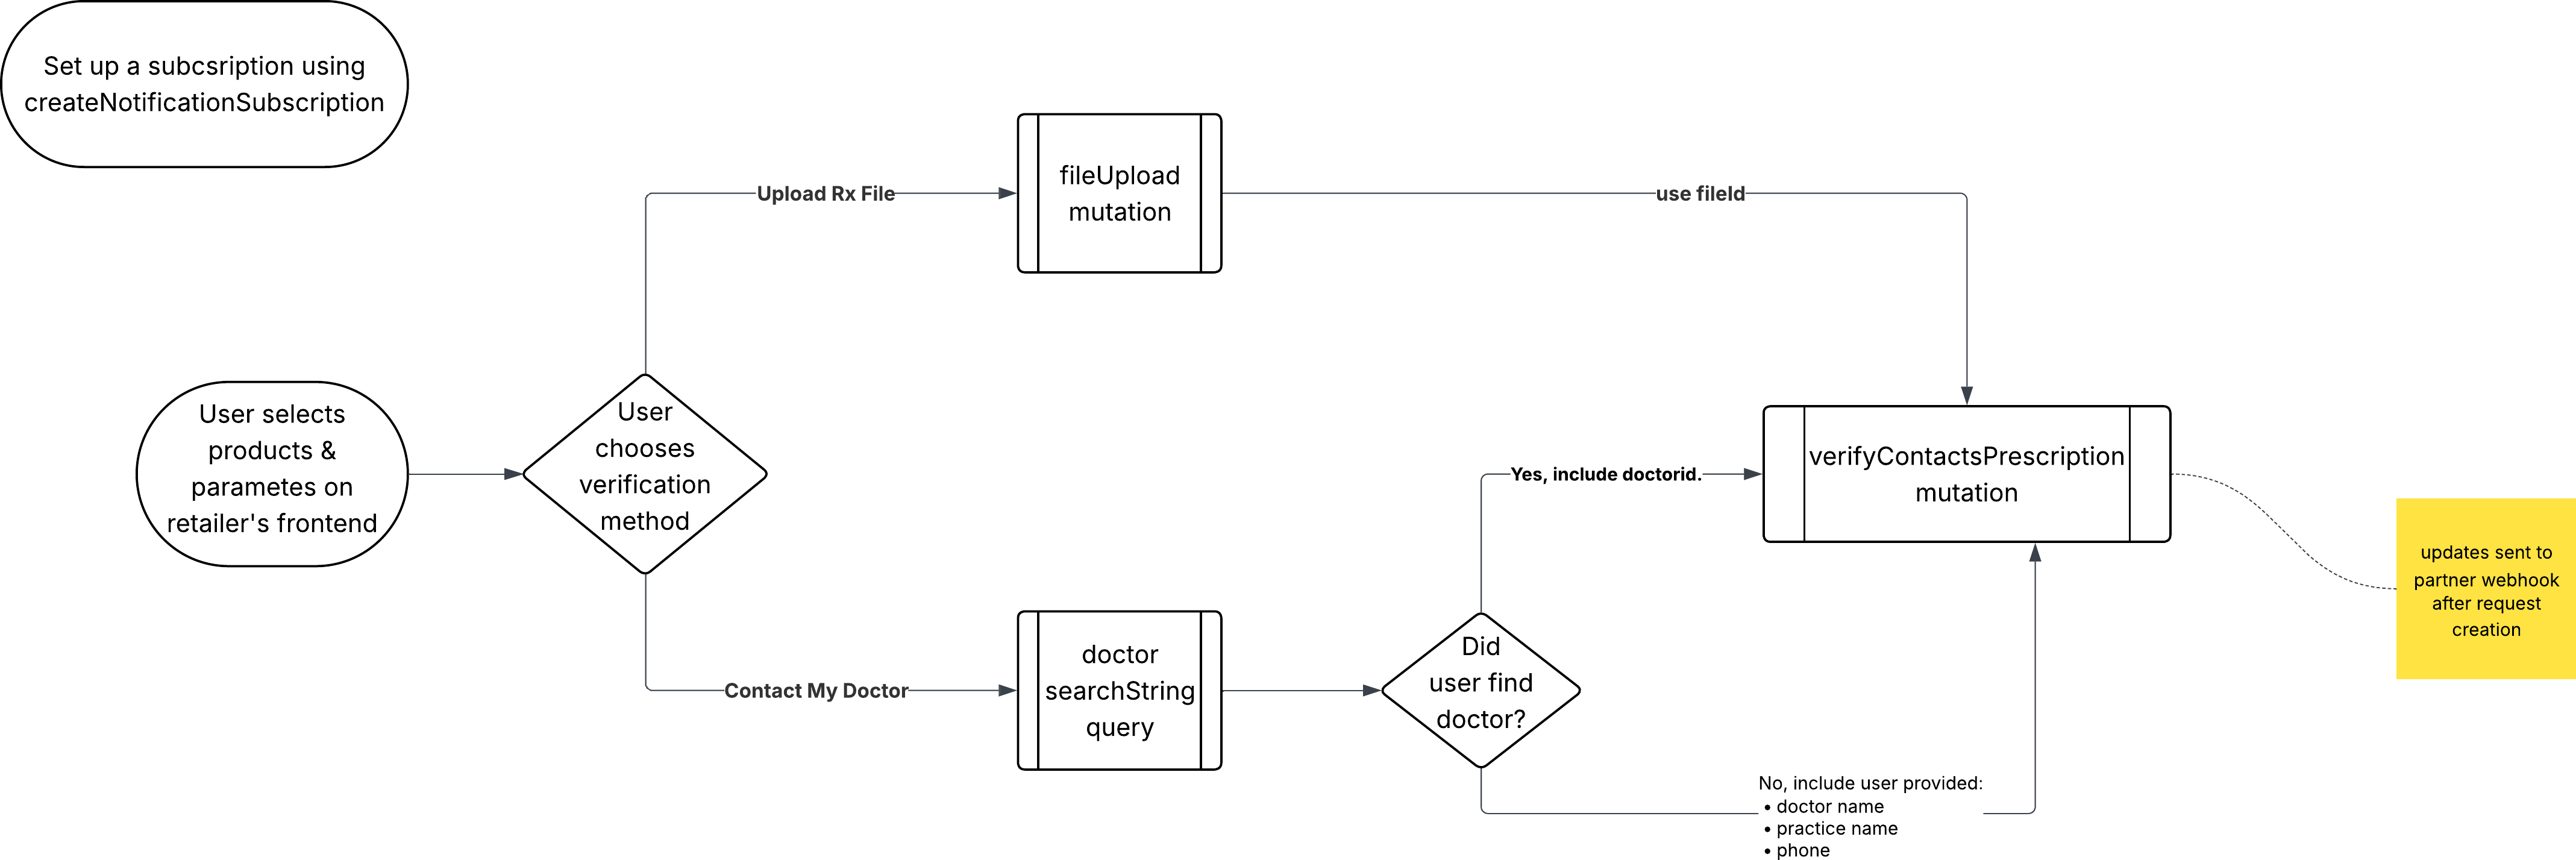
The Integration Flow at a Glance:
- Step 1: User Intent: The user selects their products and chooses a verification method.
- Step 2: Data Collection:
- File Flow: Use uploadFile to get a
fileId. - Doctor Flow: Use the doctors query to find a
doctorId, or collect manual details.
- File Flow: Use uploadFile to get a
- Step 3: Initiation: Call
verifyContactsPrescription - Step 4: Resolution: Visibly processes the request and sends updates to your registered webhook.
- Step 5: Querying: Your system can query for updates on given requests using the
jobId
Below are the primary statuses your system will receive during the verification lifecycle. For a full breakdown of reasons and required developer actions, see the Verification Statuses Reference.
| Status | Summary Description | Recommended Action |
|---|---|---|
| PENDING | The request is being processed (awaiting doctor or CS review). | Display "In Progress" to user. |
| APPROVED | The prescription is verified (actively or passively). | Proceed with order shipment. |
| CHANGES_REQUIRED | The ordered products do not match the prescription. | Prompt user to update their order. |
| DENIED | There was an issue with the prescription file or patient details. | Prompt user for new info or renewal. |
| REJECTED | The submitted data (file or doctor) was invalid or unreadable. | Prompt user to re-submit data. |